This is the second part in a 3 post series on configuring the harvest settings on John Deere's CS690 cotton stripper.
You can view the other posts in the series here:
Part 1: Configuring Harvest Doc
Part 3: Configuring a Harvest Homepage
Part 2: Configuring your 2630 to document harvest data and show you realtime harvest info
The documentation settings are configured in the GS3 settings of your 2630 display. This can be accessed by pressing the Menu Button located in the bottom right corner of the screen and selecting the tab for Greenstar GS3.
We are going to be looking at several settings in the GS3 pages to ensure proper data collection. We will also get our map settings configured to display yield data instead of simple coverage.
Documentation Setup
In order for your 2630 display to capture your harvest data, we will need to verify some settings on three different pages.
Resources
The first we will look at is the Resources page. This can be found by pressing the Resources button on the left. It is also labeled letter G.
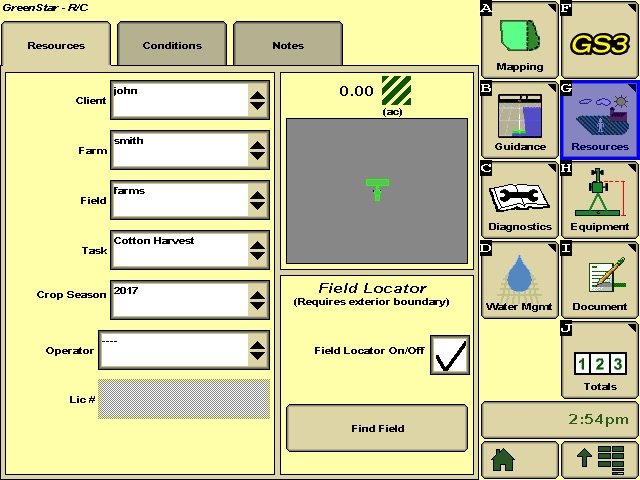
On this page we need to make sure we have filled in our Client, Farm, Field boxes correctly. This ensures that our data is captured under the correct field location. This is a very important part of the data collection process. If we don't classify our yield data correctly, it will be hard for us to base decisions off of this data down the road.
We also need to properly set our task. This can be done by touching the Task dropdown and choosing Harvest from the list. If Harvest is not present, you can touch new and type in Harvest as your new task name. Some growers prefer to be a little more detailed on the task and set the name as Cotton Harvest.
You will also need to update the crop season to the correct year.
You also have the option of entering in an operator and licence # if you desire.
Machine
The next page we need to verify settings on is the Machine page. This is access by pressing the Machine button that is labeled letter H.
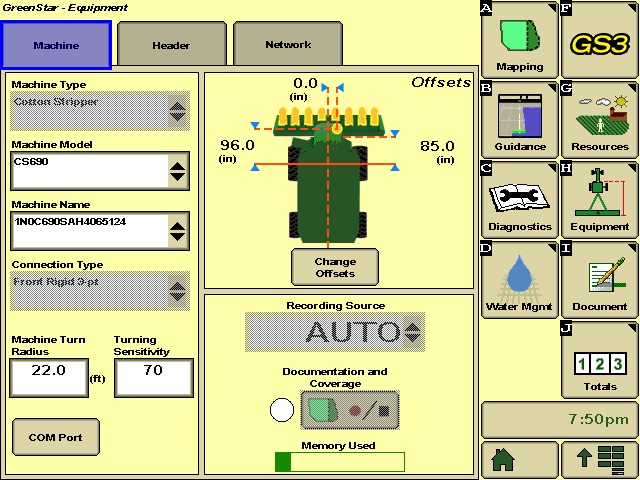
You should have a Machine and a Header tab at the top of the page. On the machine tab you will need to fill in all of the appropriate boxes to tell the display what machine you are in. On most CS690s this information will be automatically loaded for you. You will just need to verify that this information is correct.
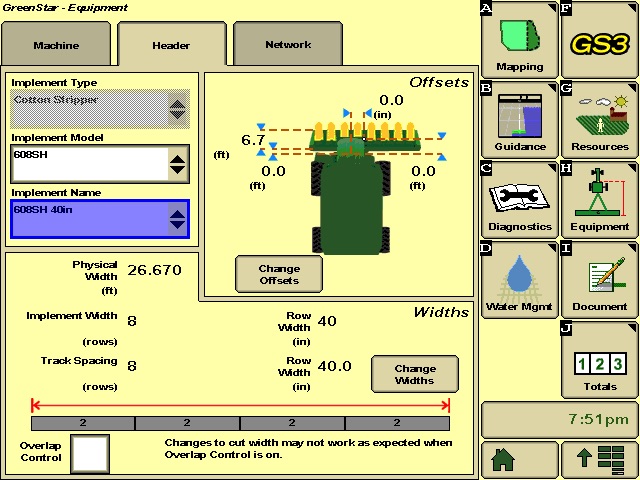
You will also need to make some adjustments to the Header tab. Your Implement Type should be greyed out and say Cotton Stripper, but you will need to select your Implement Model and Name. Once you have this information in you will need to verify that your header width is correct. If you are running a 608SH 40in header, your physical width should be 26.67 and your implement width and track spacing width need to be set to 8 rows with 40 inch row spacing.
Document
Next you will need to setup your documentation settings. These can be found under the Document tab labeled with letter I.


On this page you will need to press the Change Harvest Settings button at the top and fill in your crop type, brand, and variety. If the brand and variety you are using are not in the list, simply hit new and manually type in the names.
Once these settings are in place, you have the option of setting a load name and destination.
Configuring Map Settings to Display Yield Data
Next you will get your map settings properly configured to display your yield data. These settings will be accessed by pressing the Mapping button labeled letter A.
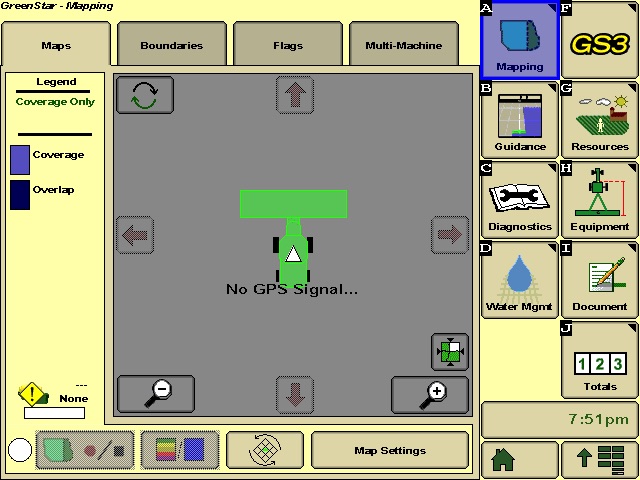
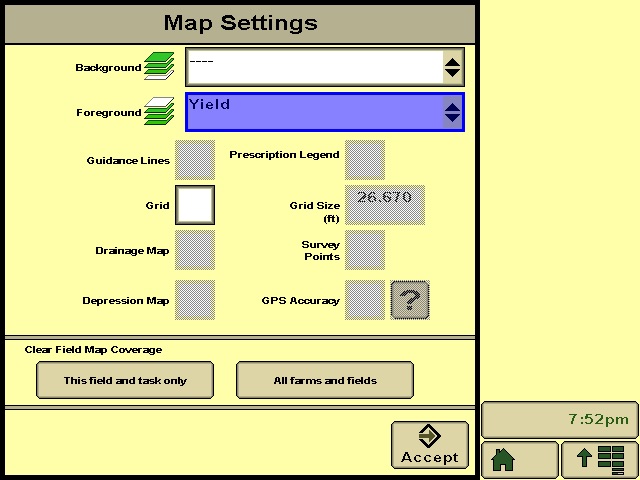
Press the Map Settings button on the bottom of the page. Next you will need to set your Foreground Layer to Yield and then press the accept button.
This will take you back to the previous page. You will then need to press the button at the bottom of the page that has the multicolored rectangle and the blue rectangle on it. This button will toggle the map between coverage and yield. When yield data is set to be displayed you will see a multicolored map legend on the left side of the screen.
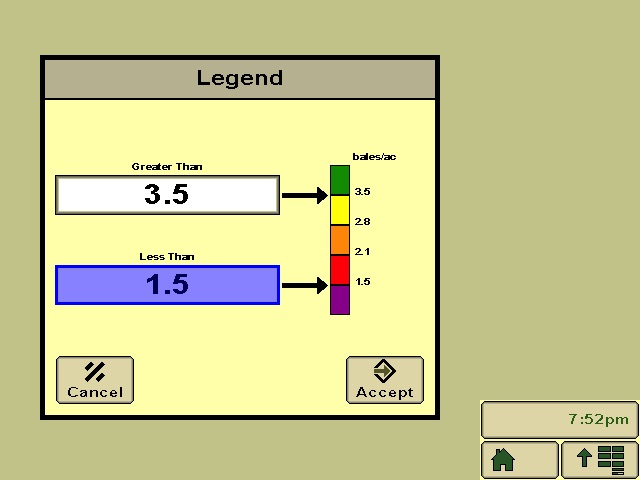
If you touch the map legend it will allow you to edit your high and low level amounts. These amounts are representing bales/acre. At anytime you can adjust these numbers to show you more detail in the field. A good rule of thumb is to put your top level about .5 bale/acre higher than you think your field will average and set your low limit about 50%-60% below your top amount.
Once these settings are in place your display is configured to capture and display your harvest data. In our third and final post of this series we are going to go over how to configure a homepage to quickly view your harvest data.
You can view the other posts in the series here:
Part 1: Configuring Harvest Doc Part 3: Configuring a Harvest Homepage