Before we get to the trouble shooting list, lets quickly go over the things your guidance system needs to operate.
Basic Requirements for using AutoTrac
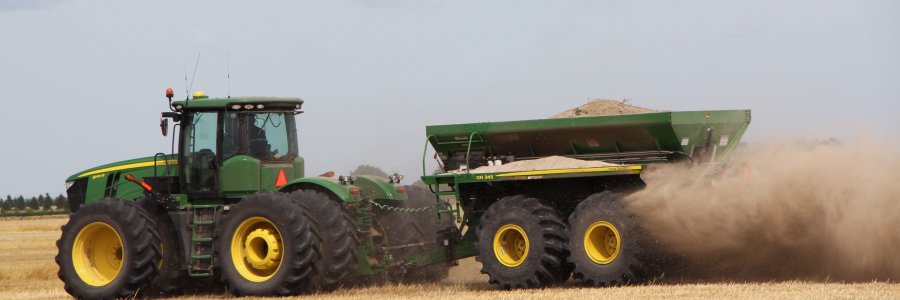
There are a few things that your John Deere guidance system needs in place before you can engage your AutoTrac.
- The tractor’s AutoTrac controller must be online
- The tractor must be clear of any active trouble codes related to the guidance system
- You must have a minimum signal level of 3D SF1
- You must have a guidance line set
- You must turn the AutoTrac system on using the steering wheel icon on your Greenstar display
- You must toggle your resume switch to engage AutoTrac
Now that we have a basic understanding of the different things that are required for John Deere's AutoTrac system to function, we will move on to the top 10 things for you to look at when you can't get your AutoTrac to engage.
1. Have you tried turning it off and on again?
The first troubleshooting step you should try is turning off the machine. Once the machine has powered off and your Greenstar display is off, unplug the display and receiver. Wait 5 to 10 seconds and plug them both back in and turn the machine back on. Many times forcing the system to “cold boot” will fix most issues.
The display and the receiver both have memory settings that enable them to start up quicker when the machine is turned on. These memory states can sometimes hold onto corrupted data and prevent your AutoTrac system from functioning properly. You can force they guidance system to flush its temporary memory and reboot by disconnecting the system from power.
It is very important that the machine be off when you attempt this step. Disconnecting the display from power when the machine is on can result in data loss.
2. Is your GPS Receiver visible on the CAN Bus?
Menu Button -> StarFire Receiver
First, you will need to verify that your receiver is visible on the CAN bus. This is easily done by hitting the menu button on your Greenstar display. If the GPS receiver shows up as one of your menu options then there are no hardware issues that are preventing the tractor from seeing your receiver.
If your receiver does not show up as one of your menu options, verify that the receiver is plugged in properly at the front of the cab near the windshield wiper.
While verifying the receiver is plugged in, inspect the harness coming out of the receiver and coming out of the tractor. Sometimes the wires in these harnesses can fail due to sun damage. If the wire shielding is cracked on either harness, it could be that moisture has gotten into the wires and is causing the voltages to be out of their proper range. This can cause the receiver to not be available on the CAN bus.
If the harnesses are damaged they will either need to be repaired or replaced to restore proper voltages and connection.
If the harness look good and the receiver is plugged in properly and you still don’t see the menu option for the receiver, you will need to inspect the ISO plug on the back of the tractor. This is a big black plug next to your SCV ports on the back of the tractor. This is the same plug that is used to hook up newer planters and rate controllers.
The ISO plug acts as a terminator on the CAN bus and if it fails, one of the things that will happen is the receiver will be knocked off the CAN bus.
If you have another tractor close that you know the guidance system is working on, you can temporarily remove the ISO plug from that tractor and plug it in on the tractor that is not functioning properly. If the receiver comes online, then you will need to contact your local John Deere Dealer to purchase a replacement ISO plug.
These plugs are very easy to swap out newer 30 series and R series tractors. The only tool you will need is a phillips screw driver. There are four screws that hold the plug in place and two weather pack style connectors that plug into the back of the plug.
If you have a 20 series tractor or older, you may need to contact your local John Deere dealer and have them come and service the plug for you. These older tractors require some special tools to remove the old plug.
3. Is your GPS Receiver running on the proper correction frequency?
Menu Button -> Starfire Receiver -> F: Main -> Setup
The next thing you will want to check is that your receiver is operating on the proper correction frequency. You can do this by hitting your Menu button in the bottom right corner of your screen. Next you will need to hit the GPS Receiver in your menu option. (Please note that you may have two menu options that show an icon that looks like the GPS Receiver. One of them will say Starfire 6000, Starfire 3000 or Starfire ITC depending on which receiver you own. The other menu button will have a smaller icon that looks like the GPS Receiver and it will say “Remote Software Updates” You do not need to press the button for “Remote Software Updates”)
Make sure you are on the main tab of the GPS receiver settings. You can do this by hitting the button in the top right corner of the screen that looks like the GPS Receiver. On this page, your second tab in from the left will be labeled “Setup”.
On the Setup tab, about halfway down the page on the left hand side, is a box labeled correction frequency. This number needs to be 1545.9675.
(This is the main signal band for the central United States. If you are in another region, you will need to check with your local John Deere dealer to find out what your frequency needs to be.)
If your number is different from this you will need to make sure the “Default” box is unchecked. This will make the number editable. Touching the number will pull up a key pad and you will be able to enter in 1545.9675.
Once you have entered the new number you will need to hit accept. This will lock in the new number. You need to leave the default box unchecked.
After a few minutes on the new frequency you should see your signal reconnect.
4. Is your receiver setup with the proper RTK settings?
Menu Button -> Starfire Receiver -> G: RTK Settings
If you still don’t have good signal and you are attempting to run RTK, you will need to verify your base station settings.
This is done by hitting your menu button and then hitting your menu option for your GPS Receiver. Your base station settings are found under Letter G, this is the second button from the top along the right side of the screen. It has an icon that looks like a GPS Receiver on a tripod.
On this page you will be able to see your RTK radio configuration. You need to verify that your operating mode is set to “Vehicle” this is found towards the top of the page on the left hand side. You will also need to verify that you have the proper information set for your radio channel and network ID.
This information is specific to the base station you are trying to use. You will need to check with your RTK network provider to get these values.
The left half of the page will show you if you have successfully connected to the tower. Near the top of the page, you will see a line that says “Status” you need to see your status listed as “OK”.
You also need to have a minimum of 7 satellite corrections in order to get 3D RTK signal. John Deere also recommends that you stay with in 12 miles of your base station in order to maintain sub inch accuracy and repeatability.
At the bottom of the page on the left side, you will see a reading for the percentage of data received from the base station. You want this number to be above 85%.
5. Do you have clear line of site to your base station?
If your percentage is falling below 85%, you need to verify that you have clear line of sight to the base station. You may have something blocking the signal. If so, try moving to a different part of the field in order to give your receiver a better chance of locking on to a good signal.
6. Is your RTK antenna tight?
You can also verify that your RTK antenna is tight. This is the black antenna that sticks up behind the GPS Receiver. Depending on the style of antenna you have, it will be screwed directly into the RTK radio that is mounted to your receiver or it may be connected by a small coax connector that runs to a magnetically mounted high gain antenna.
7. Is your base station working properly?
If you are still unable to get good signal, you should verify that the base station you are trying to run off of is working properly. Are there other machines near you that are also having trouble getting signal? If so, contact your RTK network provider so they can troubleshoot things on their end. If you know there are other machines that are running off of the base station without issue, you will need to contact your John Deere dealer and have them come inspect your GPS system for other errors.
8. Do you have a guidance line pulled up?
You have to have a guidance line pulled up in order to turn your AutoTrac on. You can verify you have a line selected by hitting your "Set Track 0/Circle/AB Curve" button and check that you have a line selected in the current track box in the top left portion of the screen.
If you do not, you will need to select one from the available list, or set a new line.
9. Is there a "Last Exit Code" listed in the AutoTrac diagnositcs page?
Book w/Wrench -> AutoTrac
On your Greenstar display, you may have an icon that looks like a book with a wrench on it where you normally have your steering wheel icon. Touching the book with a wrench will take you to a diagnostics page.
You will need to make sure the box at the top of the page says “AutoTrac”. Just below this box will be some smaller print that says “Last Exit Code Issued”. Directly to the right of this label, you will see the the reason the guidance system turned itself off.
This exit code is not always very descriptive. You may need to use the chart in the main portion of the page to see what the system is missing in order for AutoTrac to be enabled.
The chart in the middle of the page has gives a description of each thing the system is looking for and the current status of each item. You will need to look down the right hand column and find the first thing that says "No". This will help you figure out what is preventing you from using your guidance system.
10. Do you have any active diagnostic trouble codes on the tractor?
You can turn the tractor off and then back on and see if there are any diagnostic trouble codes that pop up on the tractor. Common codes that will affect your guidance system are prepended by a label of SSU. If you have any codes on the tractor you will need to write them down an call your John Deere dealer with them so they can look them up and help you get back up and running.
This list is not exhaustive, but it should get you pointed in the right direction to getting your problem solved. If you need help troubleshooting your issue feel free to use my contact form to send me a note with your contact information and a description of the issue and I will try and help get you going.