
This is the first part of a 3 post series on configuring the harvest settings on John Deere's CS690 cotton stripper.
You can view the other posts in the series here:
Part 2: Configuring Map Settings
Part 3: Configuring a Harvest Homepage
Part 1: Configuring the CS690s Harvest Doc settings
The Harvest Doc settings are accessible through the Original Greenstar Display. This can be accessed by pressing the Menu Button located in the bottom right corner of the screen and selecting the tab for the Original Greenstar Display.
Once you are in the Original Greenstar Display, you will need to press the Setup button on the left side of the page and then press letter A next to Harvest Monitor.
Your page should look like the following screenshot:

Row and Spacing
The first setting we need to verify is making sure Row and Spacings settings are correct. This can be done by pressing on Letter C next to Set Row & Spacings.
This will take us to the following page:
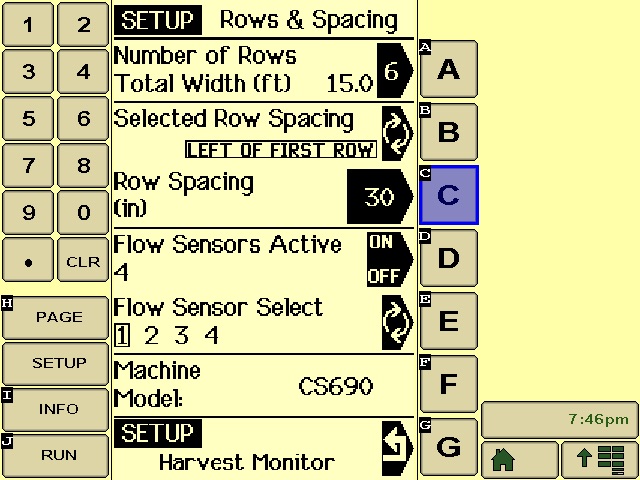
On this page there are a few pieces of information we need to make sure is correct. The first thing to check is that the model of the machine is listed as CS690. You can toggle through the available options by pressing letter F. Once you have the model listed as CS690, we can move on to the next step.
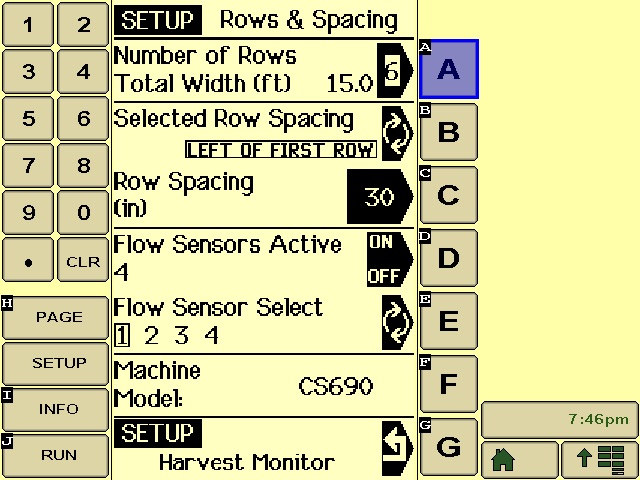
Next we need to make sure the number of rows is correct. This information is listed next to letter A. If the number is incorrect, pressing letter A will make the number editable. You will need to use the number keys on the left to enter the correct number and then press letter A again to save the updated figure.
Next we need to make sure the row spacing settings are correct. To accomplish this we will have to toggle through the rows individually and set the spacing. This is done by first select a row by pressing letter B. This will allow you to see the row and the current spacing. If the spacing needs to be changed, you will press letter C to make the number editable. You will use the numbers on the left to update to the correct spacing and then press letter C again to save the new figure.
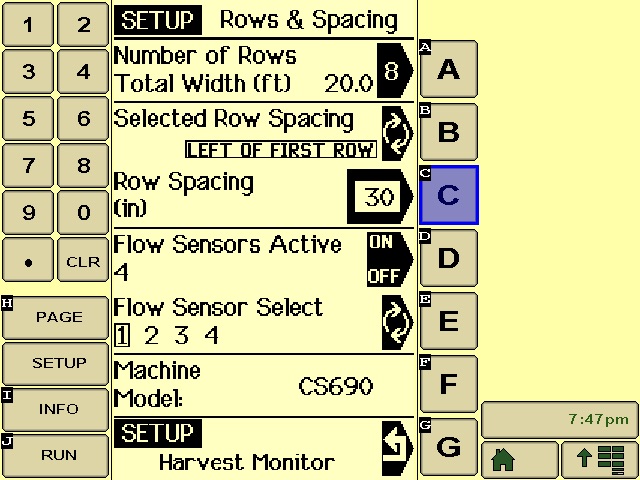
This process needs to be completed for every row. You will be able to see the total width of the header on the first row of the page. For example if your machine has an 8 row header on 40 inch spacing, your total width should say 26.7(ft) when you have each row configured correctly.
Recording On/Off
The last thing that needs to be configured in the Harvest Doc setup is to set your recording trigger. From the main setup page of your Harvest Monitor you will press letter F. You have four options to choose from: Material, Header, Combination, and Manual.
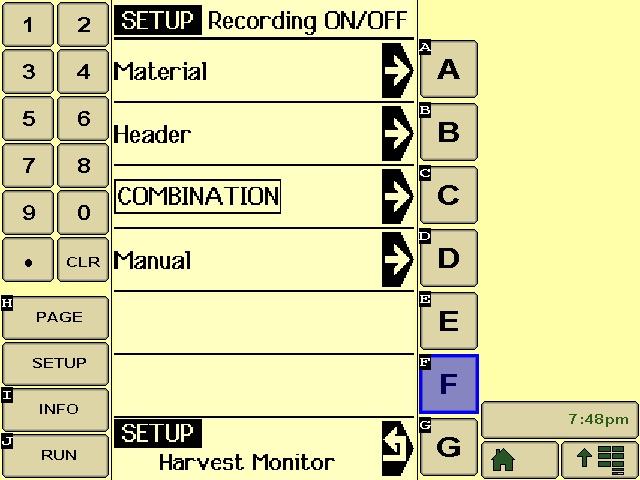
Select the option you prefer and you are done. I have seen the least trouble this season by selecting "Material." In the next post of the series, we will look at how to configure your map settings to display yield data.
You can view the other posts in the series here:
Part 2: Configuring Map Settings Part 3: Configuring a Harvest Homepage